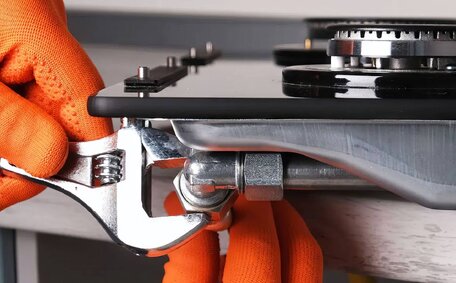
The role of gas fitting in kitchen renovations
When renovating your kitchen, it’s important to engage a licensed gas fitter to safely install, replace or alter any gas appliances and pipes. This ensures
Read MoreA noisy, leaky or constantly running toilet can be caused by a faulty flapper, worn fill valve, high water pressure or build up of dirt and debris. Fixes include adjusting or replacing the flapper, fill valve, float arm, tank bolts or water supply line. For persistent issues, call a licensed plumber.

A leaking toilet can be a significant issue, often associated with bothersome noises. Routine inspections and replacing worn parts can help prevent constantly running leaks.
Over time, internal components like the flapper or flush valve can become cracked or worn out, leading to leaks. A misaligned toilet wax ring between the bowl and drain pipe can also allow water to escape.
Specific causes include:
Promptly addressing leaks is critical to prevent water wastage and potential damage.
To accurately diagnose a leak in your toilet tank, here are some troubleshooting steps:
Regular inspections of toilet components, particularly when worn, can reduce water wastage, prevent potential damage, and aid in understanding toilet repairs.
If your toilet flapper is faulty and leaking, follow these steps to replace it:
Replacing a worn toilet flapper prevents water from continuously leaking into the bowl, saving water over time. Consider replacing your toilet flapper every 2 years as a maintenance routine.
A leaky hot water tank can result from cracked or worn components, loose fittings or sediment buildup preventing proper seals. Here are the steps to diagnose and repair a water leak in your toilet tank:
Check your toilet tank hardware and water heater regularly, replacing worn parts and ensuring tight fittings to prevent leaks. Regular maintenance is key to guard against the accelerated wear that could potentially damage your own pipes due to hard water.
For persistent leaks or complex repairs, consult a professional plumber to address the issues and prevent water damage.
Calling a professional plumber is advised when:
For reliable plumbing solutions, contact Cecil Hills Plumbing at 1300 349 338, email us at jobs@cecilhillsplumbingservices.com.au, or schedule an appointment with one of our licensed plumbers.
There are several common causes of noise in toilets:
Noise originating from inside the toilet tank tends to indicate issues with components that you can fix with replacement or adjustment. Noises during refilling may be misinterpreted as the toilet itself making noise, but they can indicate plumbing pressure issues. Getting to figure out the root cause of unusual toilet sounds can prevent ongoing water waste and damage.
Toilets can make a variety of noises that hint at different issues:
Understanding why does my toilet make specific sounds can help pinpoint faulty components to replace or adjust before more significant issues arise.
If noises persist despite DIY repairs, contact a plumber to inspect for problems requiring professional attention to restore quiet operation.
A noisy toilet can often be fixed with some simple adjustments or replacements:
Learn how the use of your water softening systems or regularly replacing parts like fill valves and flapper can help reduce buildup and deterioration that leads to noisy operation over time.
If noises persist despite adjustments and part replacements, contact a professional plumber for inspection. A squealing flapper needing replacement or issues like blocked vents requiring complex repairs may need a plumber’s expertise.
Preventing future toilet issues relies on proactive maintenance and care. Replace the flapper seal and fill valve every 2 years as routine maintenance. Use toilet bowl cleaners monthly to reduce stains and bacteria growth.
Conduct visual inspections of all toilet components every 6 months, checking for cracks, leaks, mineral buildup or deterioration.
Follow proper toilet usage rules in your household such as only flushing bodily waste and toilet paper, never harsh chemicals or wipes. Install adjustments to the toilet tank fill valve to prevent overfilling and potential leaks. Arrange annual professional maintenance, where plumbers clear drain lines with high-powered jetting and inspect for hidden issues.
Avoid in-tank toilet cleaners that can degrade flapper seals with harsh chemicals over time. Use enzyme-based cleaners instead. Routine DIY and professional maintenance are crucial to averting significant future repairs.
When renovating your kitchen, it’s important to engage a licensed gas fitter to safely install, replace or alter any gas appliances and pipes. This ensures
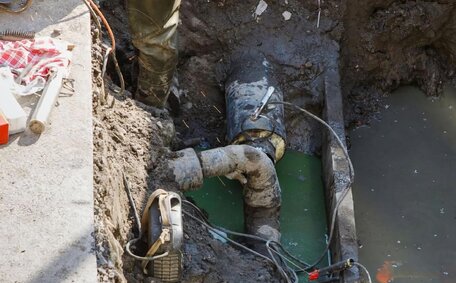
Read MoreGas line repairs require a licensed plumber to locate any leaks, fix damaged pipes and fittings, and properly seal everything to prevent future issues. Contact our emergency plumbers for safe and proper gas line repairs.
Read MoreDuring emergency plumbing situations, crucial safety precautions include turning off the main water supply to prevent flooding, wearing protective gear to avoid injuries, clearing standing water to minimize damage, and calling a licensed professional plumber for assistance.
Read MoreCecil Hills, 2171 NSW
We will call back as soon as possible.