The role of gas fitting in kitchen renovations
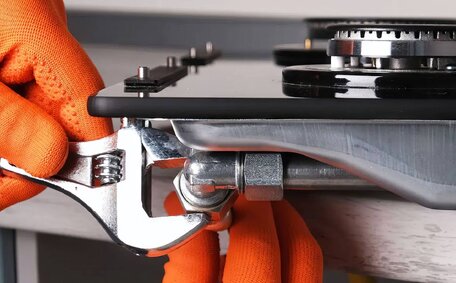
When renovating your kitchen, it’s important to engage a licensed gas fitter to safely install, replace or alter any gas appliances and pipes. This ensures
Read MoreWhen a tap turns on, the pilot light in your gas water heater ignites the main burner to heat the water.
The pilot light serves a vital safety function, preventing the build-up of unburned gas.
By having a small flame already lit, it allows the larger main burner to light instantly when hot water is required, without the need for an ignition spark. The pilot flame also acts as a fail-safe; without it, the main burner won’t ignite.
Maintaining a lit pilot light is essential for consistent hot water supply. If your gas water heater stops producing hot water, the first troubleshooting step is to learn how to relight the pilot.
Your water heater’s pilot light may extinguish due to several factors:
Regular pilot light outages may indicate underlying issues, warranting professional assessment. Frequent pilot outages can be symptomatic of thermocouple problems, valve defects, ventilation issues, or more that need diagnosing.
A pilot light that frequently extinguishes could mean that component replacement or even a new unit may be necessary. It’s best to contact a licenced gas fitter to inspect the heater and identify necessary repairs.
When a gas water heater’s pilot light goes out, safety should be the top priority before attempting to relight it. There are key precautions to take:
If you’re unsure of the unit or the relighting procedure, have your pilot light relit by a licensed professional. Safety is critical when re-establishing the pilot light flame.
Assemble the following items before attempting to relight your pilot light:
Ensure all essential tools and reference materials are at hand before accessing the pilot assembly. Familiarise yourself with safety protocols and have emergency contacts readily available. Only proceed when the area is clear of gas odours.
Follow these steps to safely understand how relight your gas water heater’s pilot light:
As always when working with gas appliances, exercise extreme caution. Have emergency numbers on hand, position fire extinguishers nearby, and evacuate if any gas smell is detected.
To relight the pilot, you first need to locate and access the pilot assembly compartment. This is usually behind a removable access panel on the lower third of the water heater.
On most heaters, the access panel is near the bottom on the front.
It may be held in place by screws or clips.
Inside you will see the gas supply lines, pilot assembly, burner tray, and gas valve. The pilot consists of a small nozzle attached to a thermocouple. Use your flashlight to illuminate the compartment as needed while relighting your pilot inside.
Be careful to avoid damaging any components during the removal or replacement of the access panel. With the pilot assembly now accessible, you can proceed to relight the pilot flame as described in earlier steps.
An important first step when relighting a water heater pilot is turning off the gas supply to the unit. This is done by rotating the gas control knob clockwise to the full 'Off’ position. You will feel the knob stop turning once it reaches this point.
After turning off the gas, allow 10-15 minutes before attempting to relight the pilot. This bleeding period allows any residual gas remaining in the pipes to dissipate. It ensures no raw gas is present to ignite while accessing the pilot assembly compartment.
Checking for gas odours before and during the relighting process is also critical. Should you detect any gas odour, exit immediately and alert the gas company or fire brigade. Safety must be the top priority when working with gas appliances.
Once the bleeding period has passed and no gas odour remains, you may open the access panel and proceed with the pilot lighting steps. Cease attempts to light the pilot if you sense the return of a gas smell.
Once the gas control knob has been turned to the ‘Pilot’ position, you are ready to light the pilot flame. Use your heater’s manual to find the igniter button, typically located by the access panel’s base, to light your pilot.
Press and maintain pressure on the gas control knob while repeatedly clicking the igniter button. Continue sparking until the pilot flame is successfully lit. You should also have a long-reach lighter ready as a backup to manually light the pilot.
Hold the gas control knob down for 60 seconds after lighting to heat up the thermocouple. This enables the magnetic valve to engage and continue the gas flow. If the pilot goes out when released, repeat the lighting process.
With the pilot lit and stable after following your heater’s manual, turn the gas control knob counterclockwise to ‘On’. This will reactivate the main burner. Monitor the indicator light to ensure functionality returns and you have hot water again.
The thermocouple is a crucial component that enables the pilot light to remain lit. It consists of two thin wires that connect to the gas valve. When heated by the pilot flame, it produces a small electrical current that magnetically holds the gas valve in the open position.
After successfully relighting the pilot, it’s important to test that the thermocouple is functioning properly before leaving. Monitor the pilot flame for 5-10 minutes. If it goes out without the gas knob being turned, this indicates thermocouple failure.
Check that the thermocouple’s connections to the gas valve are clean and secure. Retry lighting the pilot and monitor stability. If issues persist, replacement of the thermocouple may be needed.
Gently clean the thermocouple tip with steel wool to remove dirt or oxidation.
Always verify normal thermocouple performance after relighting the pilot. This ensures gas only flows to the burner when the pilot flame is present for safe ignition. Consult a licenced gas fitter if you have any concerns about the thermocouple or pilot light.
Several common issues may arise when trying to relight your gas water heater’s pilot light. Here is some troubleshooting guidance for the problems you may encounter:
If the pilot flame ignites but does not stay lit after releasing the gas control knob for 60 seconds, there are a few things to check:
If the pilot flame remains stable but you still have no hot water, potential issues include:
For ongoing pilot or hot water issues, contact a professional plumber or gas fitter for troubleshooting and repairs.
Although often a simple DIY job, some situations require a professional to relight your gas water heater’s pilot light:
For professional assistance on how relight your water heater’s pilot light or troubleshooting related issues, contact the licenced technicians at Cecil Hills Plumbing on 1300 349 338 or email jobs@cecilhillsplumbingservices.com.au to schedule an appointment.
Regular maintenance can prevent pilot light problems and extend the lifespan of your gas water heater. This includes:
For professional water heater maintenance and repairs, contact the licenced technicians at Cecil Hills Plumbing. As local plumbers serving Sydney’s greater western suburbs, we specialise in servicing all makes and models of residential and commercial gas water heaters to optimise performance and longevity.
Call us on 1300 349 338 or email jobs@cecilhillsplumbingservices.com.au to schedule comprehensive maintenance for your home or business’s hot water system.
When renovating your kitchen, it’s important to engage a licensed gas fitter to safely install, replace or alter any gas appliances and pipes. This ensures
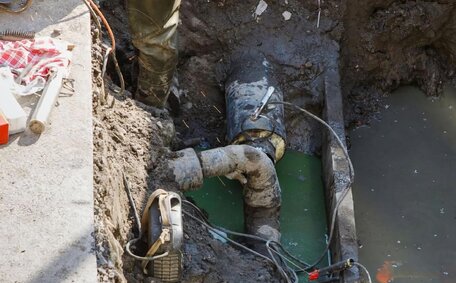
Read MoreGas line repairs require a licensed plumber to locate any leaks, fix damaged pipes and fittings, and properly seal everything to prevent future issues. Contact our emergency plumbers for safe and proper gas line repairs.
Read MoreDuring emergency plumbing situations, crucial safety precautions include turning off the main water supply to prevent flooding, wearing protective gear to avoid injuries, clearing standing water to minimize damage, and calling a licensed professional plumber for assistance.
Read MoreCecil Hills, 2171 NSW
We will call back as soon as possible.


